C++/Python
Simple guide for Python and C++
- C++ Boost 를 이용해 Python Extension 만들기 1 (Wrap C++ with Boost.Python)
- C++ Boost 를 이용해 Python Extension 만들기2 (클래스 이용하기)
C++ Boost 를 이용해 Python Extension 만들기 1 (Wrap C++ with Boost.Python)
본 내용은 부스트 tutorial문서를 참고로 작성되었습니다.
이번에는 다양한 함수와 클래스를 `python` 에서 사용하는 방법을 소개한다.
C++ 에서 구현된 함수 또는 클래스를 Python에서 사용하기 위해서는 Python Extension을 만들어서 Python 에서 import 하여 기능을 그대로 쓸 수 있다. 계산의 효율성을 높이기 위해서 복잡한 구조의 계산이 필요한 부분은 C++로 작성하고, 데이터 처리나 분산컴퓨팅 등은 Python에서 처리하도록 구현할 수 있다.
여기서는 VS2019에서 boost.Python을 이용해서 C++ 기능을 Python .pyd 모듈 파일로 빌드하는 과정을 소개한다.
- 개발환경
- VS2019
- boost 1.70.0
- Anaconda3 (Python 3.7)
Visual Studio 2019 에서 프로젝트 설정
먼저 C++ 빈프로젝트에서 시작한다(본 글에서는 “pyd_test”라는 이름의 빈프로젝트 생성함).
프로젝트 속성 >> 일반 >> 구성 형식 에서 동적 라이브러리(.dll) 선택 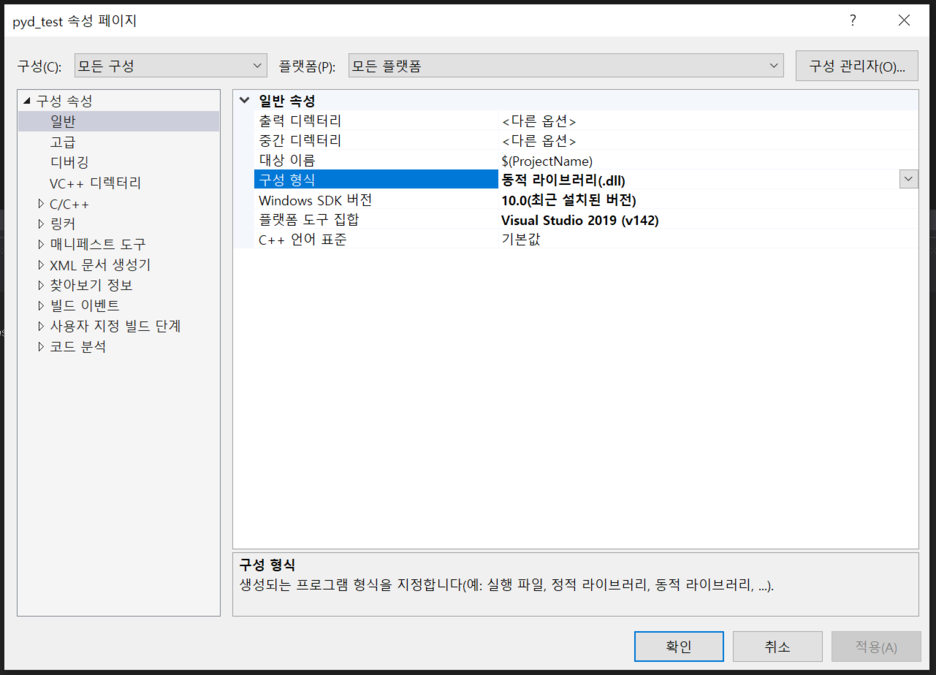
프로젝트 속성 >> 고급 >> 대상 파일 확장명 을 `.pyd` 로 변경 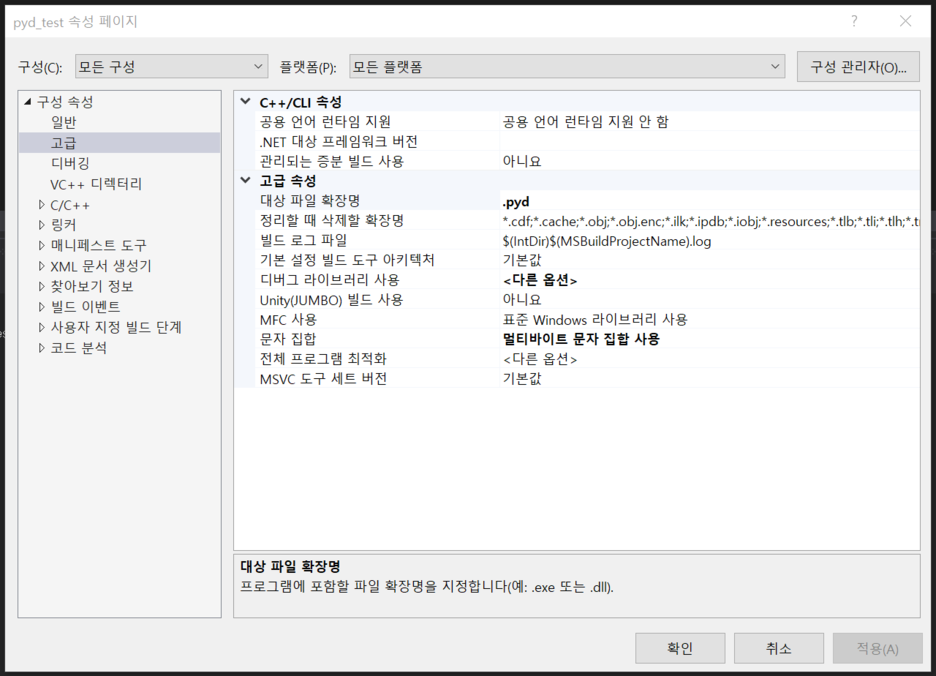
프로젝트 속성 >> VC++ 디렉터리 >> 포함 디렉터리 에 `boost`와 `python include` 폴더 추가
프로젝트 속성 >> VC++ 디렉터리 >> 라이브러리 디렉터리 에 `boost`와 `python library` 폴더 추가 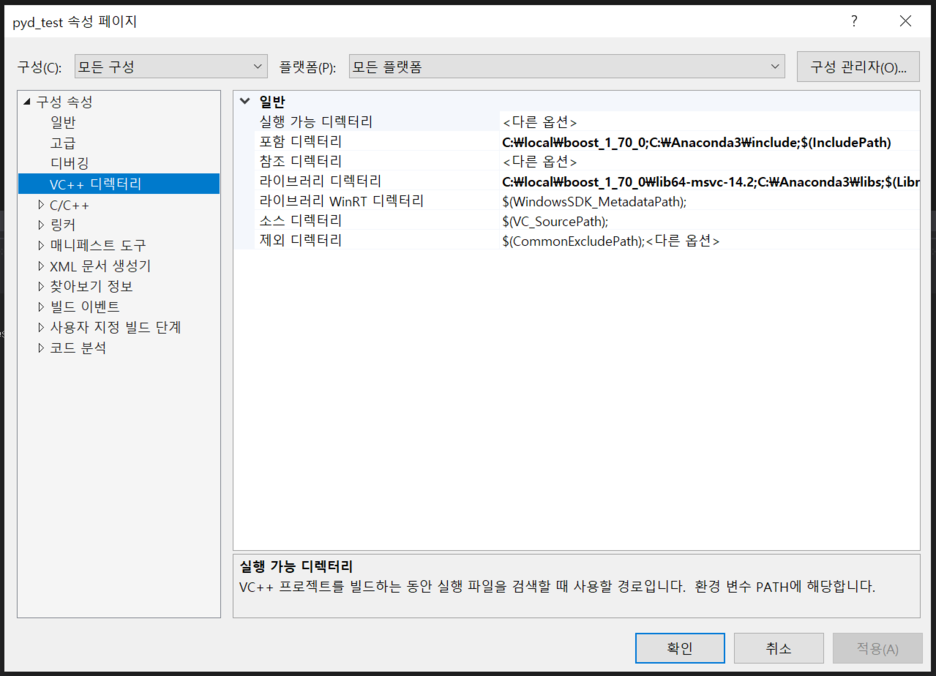
C++ Wrapping 코드 작성
간단한 문자열 "hello"를 리턴하는 C++ 함수 greet()을 작성하고 Python 에서 사용할 수 있도록 wrapping 한다.
  #define BOOST_PYTHON_STATIC_LIB

  #include <boost/python.hpp>
  #include <iostream>

  char const* greet() {
    return "hello";
  }

  BOOST_PYTHON_MODULE(pyd_test)
  {
    boost::python::def("greet", greet);
  }
wrapping 하려는 함수를 BOOST_PYTHON_MODULE 에서 다음과 같이 선언함.
boost::python::def("파이썬에서 사용할 함수 이름"(문자열), C++로 작성된 함수 이름)
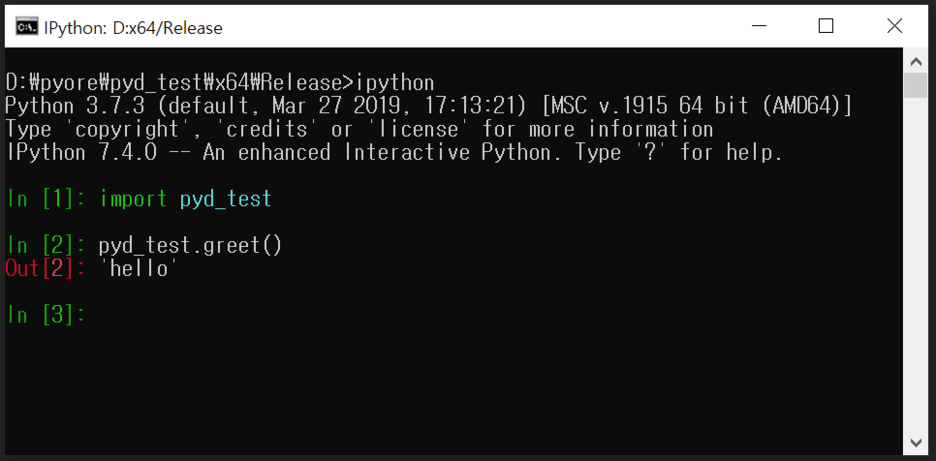
F7 으로 빌드를 마치면 "pyd_test.pyd" 파일이 생성됨.
Python 에서 .pyd 파일 import 해서 사용하기
위에서 생성한 .pyd 동적링크 라이브러리 파일을 python 경로에 복사하거나 import 하는 python 스크립트 파일과 같은 디렉터리에 복사해서 사용 가능하다.
Back to Table of contents
C++ Boost 를 이용해 Python Extension 만들기2 (클래스 이용하기)
아래 본문은 boost 공식 문서를 발췌하여 작성되었습니다. https://www.boost.org/doc/libs/1_68_0/libs/python/doc/html/tutorial/tutorial/exposi
클래스 wrapping
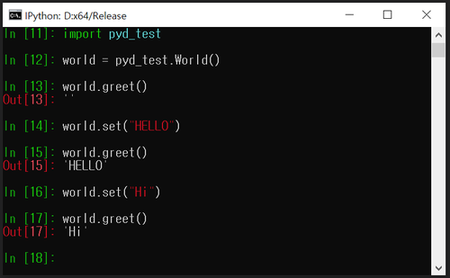
C++에서 작성된 다음의 간단한 World 클래스를 boost.python을 이용해 파이썬으로 확장하는 경우
  #define BOOST_PYTHON_STATIC_LIB

  #include <boost/python.hpp>
  using namespace boost::python;

  struct World
  {
    void set(std::string msg) { this->msg = msg; }
    std::string greet() { return msg; }
    std::string msg;
  };

  BOOST_PYTHON_MODULE(pyd_test)
  {
    class_<World>("World")
      .def("greet", &World::greet)
      .def("set", &World::set)
  }
클래스 World 를 python 에서 “World”로 사용하도록 expose함
멤버함수 World::greet 와 World::set을 각각 “greet”, “set” 으로 내보냄
클래스 생성자 내보내기
#define BOOST_PYTHON_STATIC_LIB

#include <boost/python.hpp>
using namespace boost::python;

struct World
{
	World(std::string msg) : msg(msg) {} // added constructor
	void set(std::string msg) { this->msg = msg; }
	std::string greet() { return msg; }
	std::string msg;
};

BOOST_PYTHON_MODULE(pyd_test)
{
	class_<World>("World", init<std::string>())
		.def("greet", &World::greet)
		.def("set", &World::set)
		;
}
World 생성자를 내보내기 위해서는 init<인자 타입> 을 이용한다.
오버로딩 생성자를 추가로 내보내기 위해서는 .def에 init<인자 타입>을 추가할 수 있다.
class_<World>("World", init<std::string>())
    .def(init<double, double>())
    .def("greet", &World::greet)
    .def("set", &World::set);
클래스 멤버 변수 내보내기
struct Var
{
	Var(std::string name) : name(name), value() {}
	std::string const name;
	float value;
};

BOOST_PYTHON_MODULE(pyd_test)
{
	class_<Var>("Var", init<std::string>())
		.def_readonly("name", &Var::name)
		.def_readwrite("value", &Var::value);
}
변수는 readonly 와 read/write 로 구분하여 내보내기할 수 있다.
Back to Table of contents